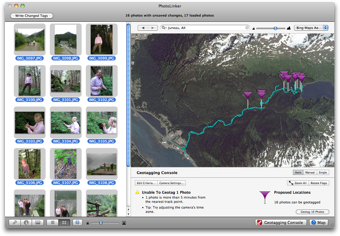
Geotagging Quick Start
If you recorded a track log with your GPS receiver you can use PhotoLinker's Auto Mode to geotag your photos, otherwise you can manually drag and drop photos to locations on the map.
In both cases tracks and photos are added by simply dragging them into PhotoLinker and dropping them on the map or image browser.
No GPS tracks: Manual Geotagging
- Type an address or location into the Location Search Box and hit return.
- Drag one or more photos from the image browser to a location on the map.
- To write the tags back the file, click Write Changed Tags.
As an alternative to dragging-and-dropping photos, you can also right-click a location on the map and select Geotag to point.
After a photo has been geotagged, right clicking on the map allows you to set the location shown in the image as well as the image direction.
GPS Tracks: Auto Mode Quick Start
- Select one or more photos and open the Geotagging Console

- Set your camera's time zone.
- The Proposed Locations for the selected photos will automatically show on the map. Hovering over the flags will provide more information.
- You can adjust the camera's time zone or shift & date and time and the proposed locations will instantly adjust.
- When you are satisfied with the results, click the Geotag Photo button to pin the photos.
- To write the tags back the file, click Write Changed Tags.
Related Topics
- About geotagging
- Geotagging quick start
- Automatic geotagging mode
- Manual geotagging mode
- Single geotagging mode
- Setting the image direction and location shown
- About reverse geocoding
Copyright © 2004-2014 Early Innovations, LLC

